Saturday, March 27, 2010

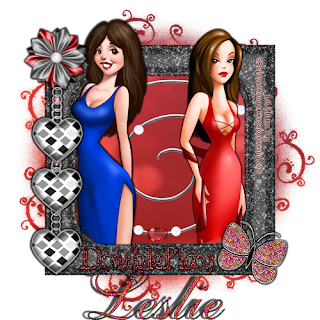
Double Play Tut


hi any resemblance to another tutorial is purely Coincidence.

i'm using the wonderful art of popeye wong.  http://www.popeyewong.com/
mask - wee scott lass


scrap kit by :


[1] open a new 500x500 transparent image
[2] load the frame & resize to fit on the image in a way that your comfy with
[3] load paper 2 behind the frame & merge the paper to the background not the frame
apply mask wsl340 & merge group.
[4] place the swirly embellishment between the frame & the mask.
[5] take the heart charm & place it on the left side of the frame & layer it like i did.
merge the charms together.
[6]  next take the flower paste it onto your charms & resize it so that it looks like a clasp holding the charms together
[7]  take the butterfly & resize it 50%, sharpen & place it on the lower right frame
[8]  choose 1 or 2 sexy elegant tubes that call your name. fit them in the frame anyway that makes you happy & apply a dropshadow.
my settings: vertical\horizontal: 0,
opacity 100,
blur 2,
color black.


apply credits & fonts & your done.

happy tagging. ;D

i hope i was good enough at explaining my proccess.

Monday, March 22, 2010

Sweet StrawBerry Tutorial


this is my first tut so please be nice and don't steal.
i used the strawberriesNcream scrapkit by kia.
font is Allegro [google it cause i forgot where i got it lol]
art by © Popeye Wong he's an FTU artist.
free plugin Xero

load the temp press sift+ D and delete the original
delete the © layer
hide the background layer if you like transparent tags like me.
load paper 3 into the temp
use the magic wand tool on the flower layer then invert it highlight paper 3 press delete
press select none & the paper & flower layers
then adjust_add noise_gaussian 27% monochrome checked

load paper 2 into the temp 
use magic wand on circle 1 layer just like you did previously
merge paper & circle 1 layers
effects_xero_duochrome
use default settings
then use ellipse tool 
set it to circle
width 4
get it to the same size as circle 1 layer
BG_null
foreground color from the paper
add noise settings as before but change the % to 100
& merge it to circle 1

now choose paper 5
[yes another paper ;D]
put it onto circle 2 magic wand it like before
yada, yada, yada
merge
xero_mistifier
settings 255 all the way down baby
use luminance so that it looks dark & doesn't stand out

choose a sweet tube
i used PW's orange juice tube
paste it onto circle 2
erase the parts that stand outside the circle
xero_radiance
twice [default settings]

then use luminance [or legacy] on the tube

now paste the same tube again
resize 60%
& move around the temp any which way that you want to
i put her the way she is cause she hugs the circle perfectly.
insert the lollipop behind her and resize about 40%


add credits
drop shadow your heart out


the shadow i used around the girl and the lolli [both merged i forgot to add. lol]
vertical&horizontal 0,
blur 2,
opacity 100,
black
i did it until there was a border all the way around.

i hope you like my first tut.
i'm super nervous.
i should have made a better tag, but oh well.
try to leave some love please.
if you have any tips on how i can make a better tut drop me a line


Sunday, March 21, 2010

Me & My Rat Stat

yes the title is correct. lol ;)
the artist is JBG & you can go to cilm.com for more info on her. 
don't ask me to spell her name out. LMFAO!!
preview below.
link at 4shared

Caron Vinson Stat

here is a stat that i made by the wonderful artist Caron Vinson.
Please go to cilm.com for licensing info and such on her and others.
preview below. DL link 4shared

my new blog!!!!! Yipppppppyyyyyyy!!!!!!

hi all!

i just got a blog. yayyyyyy!!!
 i hope to post more content when i get comfortable with blogging.
 i can't think of anything else to say.
bye bye,
LA Charm